We prevent polycrylic streaks by working with thin coats and maintaining a wet edge—always brush from wet areas into dry sections following the wood grain. Use quality synthetic bristles, never foam brushes, and apply long even strokes without stopping mid-surface. Stir gently to avoid bubbles, work in manageable sections, and never go back over partially dried areas. The fast-drying formula demands speed and precision, but master these fundamentals and you’ll discover the advanced techniques that separate flawless finishes from amateur disasters.
Some of the links in this article may be affiliate links. If you make a purchase through these links, we may earn a small commission at no extra cost to you. Thank you.
What Is Polycrylic and When to Use It
Polycrylic isn’t your grandmother’s varnish—it’s Minwax’s water-based wonder that’ll protect your wood without turning it into a yellowed disaster. This crystal-clear finish dries fast and keeps dirt, dust, and moisture from destroying your hard work.
The application benefits are serious: no yellowing, crystal-clear results, and it’s perfect for light woods and painted surfaces.
But here’s the catch—it’s strictly indoor-only territory. The runny consistency makes outdoor projects a nightmare.
Project suitability matters more than you think. Small indoor projects? Perfect.
Large surfaces or vertical applications? You’re asking for trouble. The quick dry time works against you on bigger jobs, creating streaks faster than you can say “disaster.”
Essential Tools and Surface Preparation
Three things will make or break your polycrylic finish: the right tools, proper prep, and zero shortcuts.
Surface preparation starts with 80 or 100 grit sandpaper, then finish with 120 or 150 grit for smoothness. Working with raw wood? Wet it first, then sand. This prevents grain raising—trust us on this one.
Fill gaps and nail holes with DIY wood filler. No exceptions.
Your essential tools include a quality synthetic bristle brush. Skip the foam brushes—they’re product hogs that’ll sabotage your finish.
Workspace matters. Guarantee proper ventilation and avoid high humidity. Polycrylic doesn’t forgive poor conditions.
These steps aren’t suggestions—they’re requirements for streak-free results.
Proper Application Techniques for Smooth Results
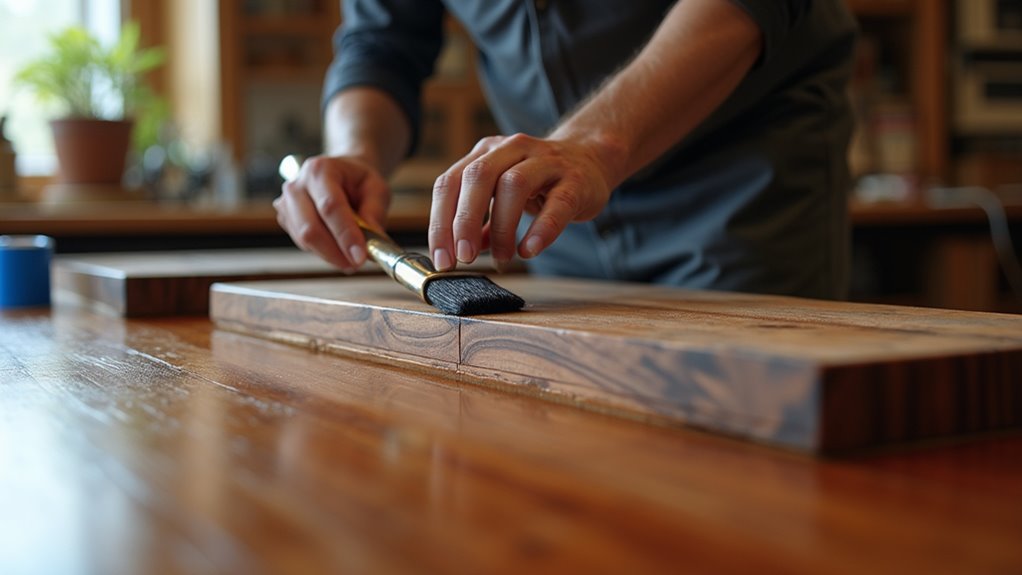
Four critical moves separate amateur results from professional-grade finishes.
First, grab that high-quality synthetic bristle brush—it’s non-negotiable. Apply Polycrylic in long, even strokes following the wood grain. No exceptions.
Second application tip: maintain a wet edge religiously. Work from wet to dry areas, never the reverse. This prevents overlapping disasters that’ll haunt your project.
Third brush technique: apply thin coats only. Let each dry two hours, then lightly sand with 220-grit paper. Skip this step and you’ll regret it.
Fourth—and this one trips up everyone—gently stir, never shake the can. Bubbles are finish killers.
Final reality check: don’t sand your last coat. We see this mistake constantly. Leave it alone. Your finish depends on restraint here.
Drying Times and Recommended Number of Coats
Timing separates the pros from the weekend warriors who rush everything. Polycrylic’s drying duration isn’t negotiable—two hours minimum before you even think about touching it. Three hours for light handling, period.
Here’s your coat application blueprint:
- Apply three coats total—Minwax knows what they’re talking about.
- Sand between coats with 220 grit—after that two-hour drying window.
- Skip sanding the final coat—you’ll wreck the finish otherwise.
- Wait 24 hours before normal use—patience pays dividends.
Each coat needs complete drying before the next goes on. No shortcuts, no exceptions.
Environmental conditions affect curing times, so don’t get cute with the schedule. Rush the process, and you’ll be stripping everything back to bare wood. We’ve seen it happen countless times.
Sanding Between Coats and Best Practices

Between those drying periods, you’ve got work to do.
We’re lightly sanding each coat with 220-grit sandpaper—no exceptions. Wait two hours minimum before touching that surface, or you’ll wreck everything.
These sanding techniques aren’t optional; they’re what separates amateur work from professional finish smoothness.
Hit every square inch, then vacuum with your ShopVac. Follow up with a tack cloth to grab every dust particle.
Miss this step? Enjoy your bumpy finish.
Here’s your golden rule: never sand the final coat. That’s your money shot—the smooth surface you’ve been building toward.
And forget steel wool entirely with water-based Polycrylic. It rusts, contaminating your finish with debris you’ll never remove.
How to Fix Streaks and Brush Strokes
When streaks and brush strokes rear their ugly heads in your Polycrylic finish, don’t panic—we’re fixing this mess with surgical precision.
Here’s your streak removal techniques arsenal for application troubleshooting:
- Sand the disaster zone with 220-grit sandpaper—light pressure only. We’re smoothing imperfections, not creating craters.
- Vacuum everything with your ShopVac, then follow up with a tack cloth. Dust particles are finish killers.
- Wait two full hours before reapplying. Rushing creates more streaks than a dirty windshield.
- Test your technique on a hidden area first. Better to fail small than spectacularly.
Never use steel wool with water-based Polycrylic—rust contamination turns your project into abstract art nobody wants.
Master these fixes once, and streaks become yesterday’s problem.
Frequently Asked Questions
How to Get a Smooth Finish With Polycrylic?
We achieve smooth application by using synthetic bristle brushes with long, even strokes following wood grain. Our finish techniques include thin coats, maintaining wet edges, and light sanding between applications for ideal results.
What Is the Best Applicator for Polycrylic?
We recommend high-quality synthetic bristle brushes as the best applicator for polycrylic application. They minimize brush strokes and deliver smoother finishes than foam brushes or rollers, which can cause drips and bubbles.
How to Apply Polycrylic Without Bubbles?
Want bubble-free results? We’ll use essential bubbles prevention techniques: gently stir instead of shaking, apply with quality brushes using slow strokes, and follow proven polycrylic application tips for smooth finishes.
How to Remove Brush Strokes From Polycrylic?
We’ll lightly sand brush strokes with 220-grit sandpaper, then reapply thin coats. For future applications, we recommend switching from brush application to roller technique, which greatly reduces stroke marks and creates smoother finishes.