We reach for oil-based primer when we’re tackling the heavy-duty jobs—bleeding stains from water damage, nicotine, or ink that’ll punch right through weaker primers. It’s our go-to for sealing porous wood that drinks paint like a desert, blocking tannin bleed from cedar and redwood, and creating bulletproof adhesion on bare metal or challenging surfaces. The extended dry time means serious penetration and stain-blocking power that water-based alternatives simply can’t match. Master these applications and you’ll understand why professionals swear by this workhorse.
Some of the links in this article may be affiliate links. If you make a purchase through these links, we may earn a small commission at no extra cost to you. Thank you.
What Is Oil-Based Primer?
We’re talking about a powerhouse formula built with drying oils like linseed or tung, plus alkyd resins.
These oil based properties create adhesion that’ll make your paint stick like it means business. The solvents—mineral spirits or turpentine—slow the drying process, but here’s the payoff: unmatched stain-blocking power.
Water damage? Nicotine stains? Ink marks? Oil-based primer laughs at them all.
The primer advantages don’t stop there. It works with both oil and latex paints, seals porous surfaces like a champ, and prevents tannin bleed from problematic woods.
Think cedar, redwood—the troublemakers.
Bottom line: when surfaces fight back, oil-based primer fights harder.
Sealing Porous Surfaces and Preventing Uneven Paint Absorption
Imagine this: you’re painting bare wood, and half your surface drinks up paint like a sponge while the other half barely takes any. That’s porous surface chaos—and it’s exactly why oil-based primer exists.
Oil-based primers seal inconsistent absorption patterns dead in their tracks. Wood surfaces are notorious for this behavior, creating blotchy, unprofessional results without proper preparation.
Best practices demand addressing porosity before topcoat application.
Here’s what oil-based primers tackle:
- Tannin bleed control – Stops cedar and redwood stains from bleeding through
- Stain blocking power – Seals damaged or previously stained surfaces completely
- Uniform absorption – Creates consistent paint uptake across entire surface
Smart primer selection means choosing oil-based formulations for challenging substrates. The extended dry time isn’t a bug—it’s a feature, allowing thorough penetration and superior adhesion.
Blocking Stains From Water, Nicotine, Ink, and Crayon Marks

Beyond absorption issues, oil-based primer becomes your heavy-duty stain assassin when faced with the worst offenders: water damage, nicotine residue, ink spills, and crayon artwork.
We’re talking about stains that laugh at water-based primers and bleed through like vengeful ghosts. Water stains? Sealed. Nicotine’s yellow death grip? Neutralized. That ink explosion from last Tuesday? Buried forever. Your toddler’s crayon masterpiece on the hallway wall? Consider it ancient history.
Here’s the brutal truth: proper surface preparation with oil-based primer doesn’t just cover these stains—it creates an impenetrable barrier that prevents bleed-through entirely.
This isn’t cosmetic coverage; it’s molecular-level stain prevention. One coat eliminates ghosting, ensuring your topcoat delivers the clean, uniform finish you actually paid for.
Best Applications for Wood and Metal Surfaces
When bare wood and raw metal demand bulletproof protection, oil-based primer transforms from optional upgrade to mission-critical foundation.
We’re talking serious adhesion power here—the kind that laughs at peeling paint nightmares.
Best practices start with surface prep. Clean thoroughly, sand lightly, then apply your primer like you mean it.
Oil-based formulas excel on cedar, redwood, and raw steel because they penetrate deep and lock down tight.
Common mistakes? Skipping primer entirely or choosing water-based alternatives for challenging surfaces. Don’t.
- Unfinished wood: Prevents tannin bleed and creates rock-solid paint adhesion
- Raw metal: Stops rust before it starts while ensuring long-term durability
- Previously painted surfaces: Guarantees uniform coverage and eliminates adhesion failures
Preventing Tannin Bleed From Cedar and Redwood

Cedar and redwood look gorgeous until those ugly brown stannins start bleeding through your perfect paint job.
Those tannin characteristics make these woods notorious for ruining finishes—but we’ve got the solution.
Oil-based primer creates an impenetrable barrier that locks those tannins where they belong: trapped in the wood.
While water-based primers fail miserably against bleed-through, oil-based options seal the deal completely.
Apply at least one coat before any topcoat. No shortcuts, no exceptions.
Cedar treatments require this non-negotiable step if you want professional results.
Professional painters swear by oil-based primers for high-tannin woods because they work. Period.
The sealing properties prevent discoloration and deliver that uniform, flawless appearance you’re after.
Skip this step, and you’ll be repainting within months.
Transitioning Between Different Paint Types
Switching paint types without proper preparation is like building a house on quicksand—everything falls apart fast.
When you’re dealing with latex compatibility issues or managing an oil paint changeover, oil-based primer becomes your insurance policy against disaster.
We can’t stress this enough: different paint chemistries don’t play nice together.
Latex over oil? You’ll get peeling nightmares. Oil over latex? Adhesion problems galore.
Oil-based primer creates the neutral zone these incompatible systems need.
Here’s your game plan:
- Clean and sand existing surfaces thoroughly before applying oil-based primer
- Use oil-based primer when switching from latex to oil-based topcoats
- Apply oil primer over old oil paint before using latex finishes
Skip this step, and you’re gambling with your entire project.
Proper Application Techniques and Drying Considerations
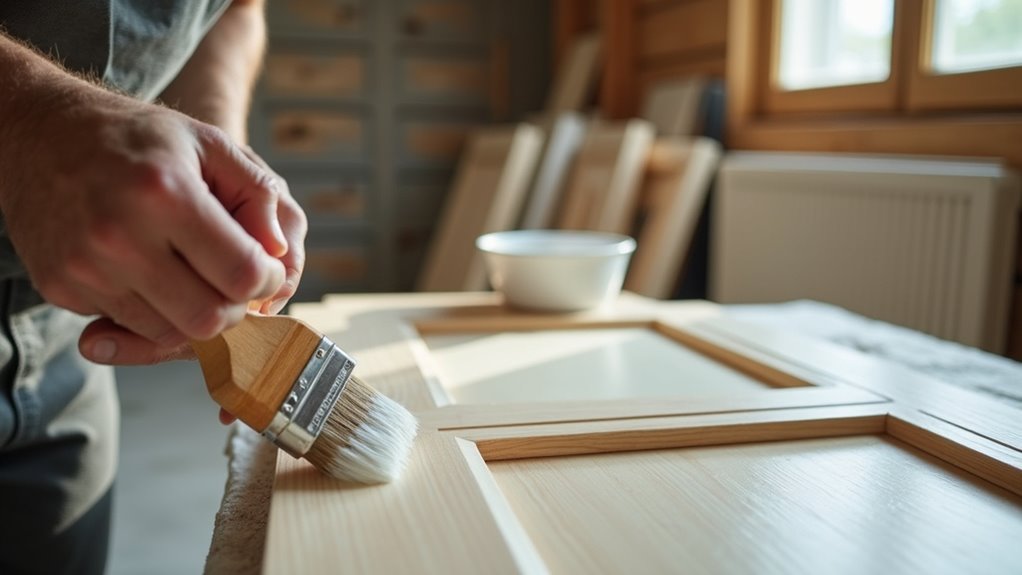
Getting your paint type strategy right means nothing if you botch the application—and oil-based primer doesn’t forgive sloppy technique. Start with surgical-level surface prep: scrub away dust, grease, and old paint remnants. No shortcuts here.
Your application tools matter. High-quality bristle brushes or rollers deliver even coverage—cheap tools create streaky disasters. Stir that primer like your project depends on it, because separation kills uniformity.
Apply thin coats only. Thick applications won’t dry properly and you’ll hate yourself later.
Here’s where drying times separate amateurs from pros: oil-based primers need 8-16 hours minimum before topcoating. Water-based primers spoil us with speed—oil demands patience.
Once dried, light sanding creates the smooth foundation your finish coat craves. Skip this step, and you’re basically gambling with adhesion.
Frequently Asked Questions
What Are the Disadvantages of Oil-Based Primers?
Oil-based primers present several disadvantages we should consider: longer drying times, health concerns from VOC emissions, environmental impact, difficult cleanup requiring solvents, challenging application, and decreasing availability due to regulations.
Can You Use Oil-Based Primer With Water-Based Paint?
Walking on thin ice, we can use oil-based primer with water-based paint, but oil based compatibility isn’t ideal. Poor paint adhesion may occur, so we’d recommend matching primer and paint types for best results.
What Is the Difference Between Oil Based Primer and Regular Primer?
Oil-based primer provides superior stain-blocking and better paint adhesion compared to regular water-based primers. We’ll find oil primer benefits include enhanced durability on porous surfaces, though it requires longer drying times.
What Is the Best Way to Apply Oil-Based Primer?
We’ll achieve the best results using proper application techniques: thoroughly clean surfaces for surface preparation, stir primer completely, apply thin even coats with quality bristle brushes, and allow 8-16 hours drying time.